psi-slides · presentation software for lecturers · Diese Seite auf Deutsch
Write the lecture once.
One Markdown file goes in. Four HTML files come out: the projection for the room, a cockpit for your own screen, and two handouts. Built from the same file, they cannot drift apart.
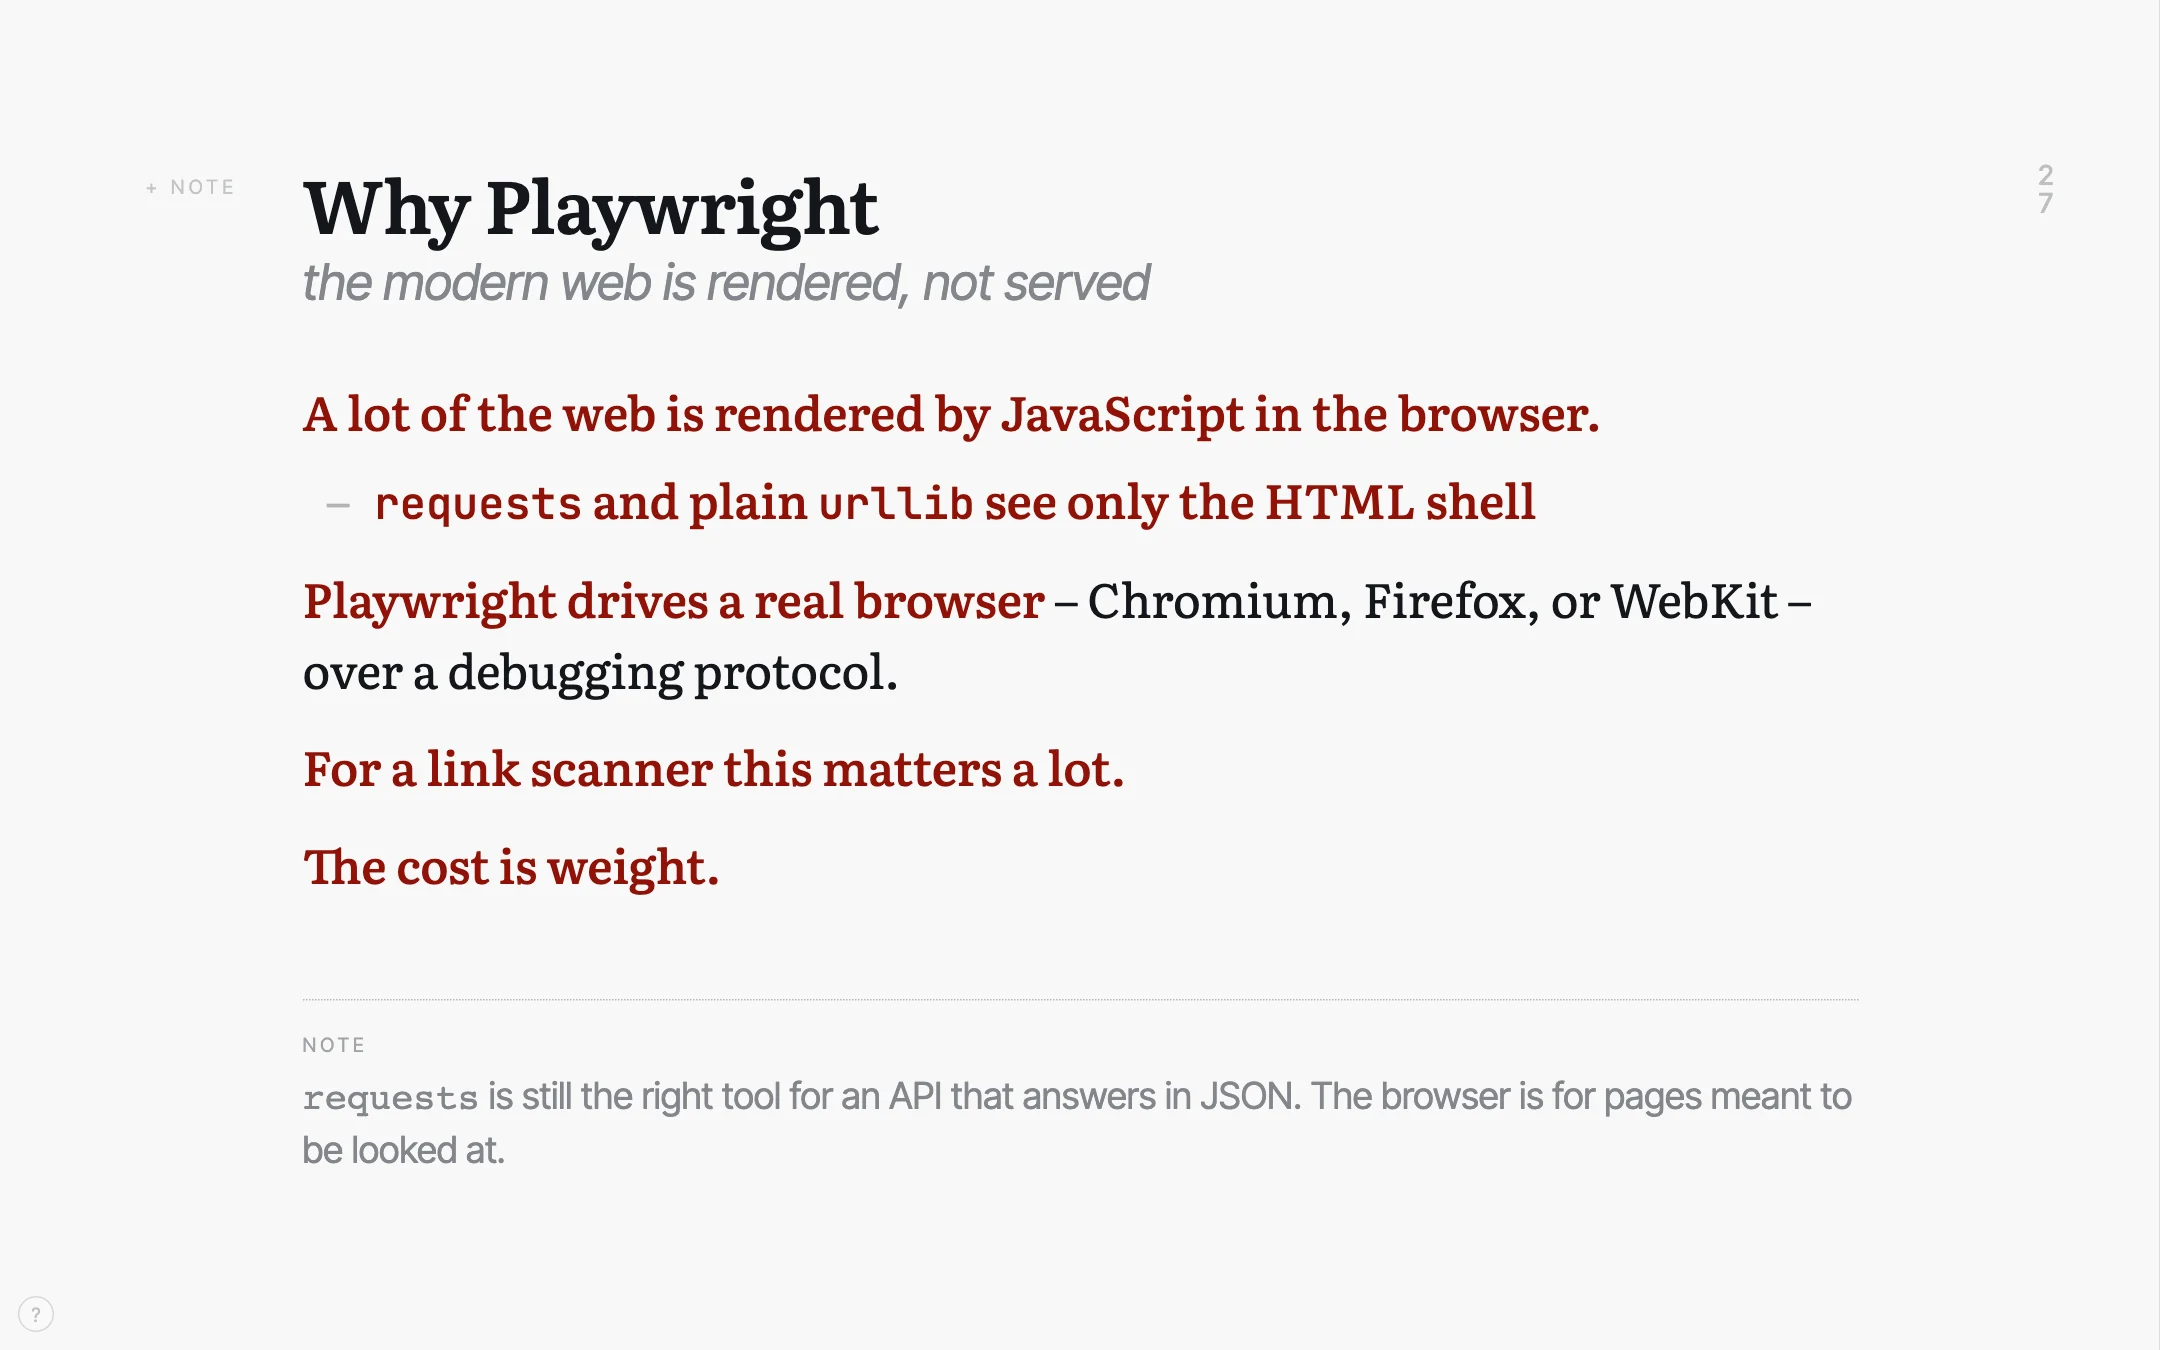
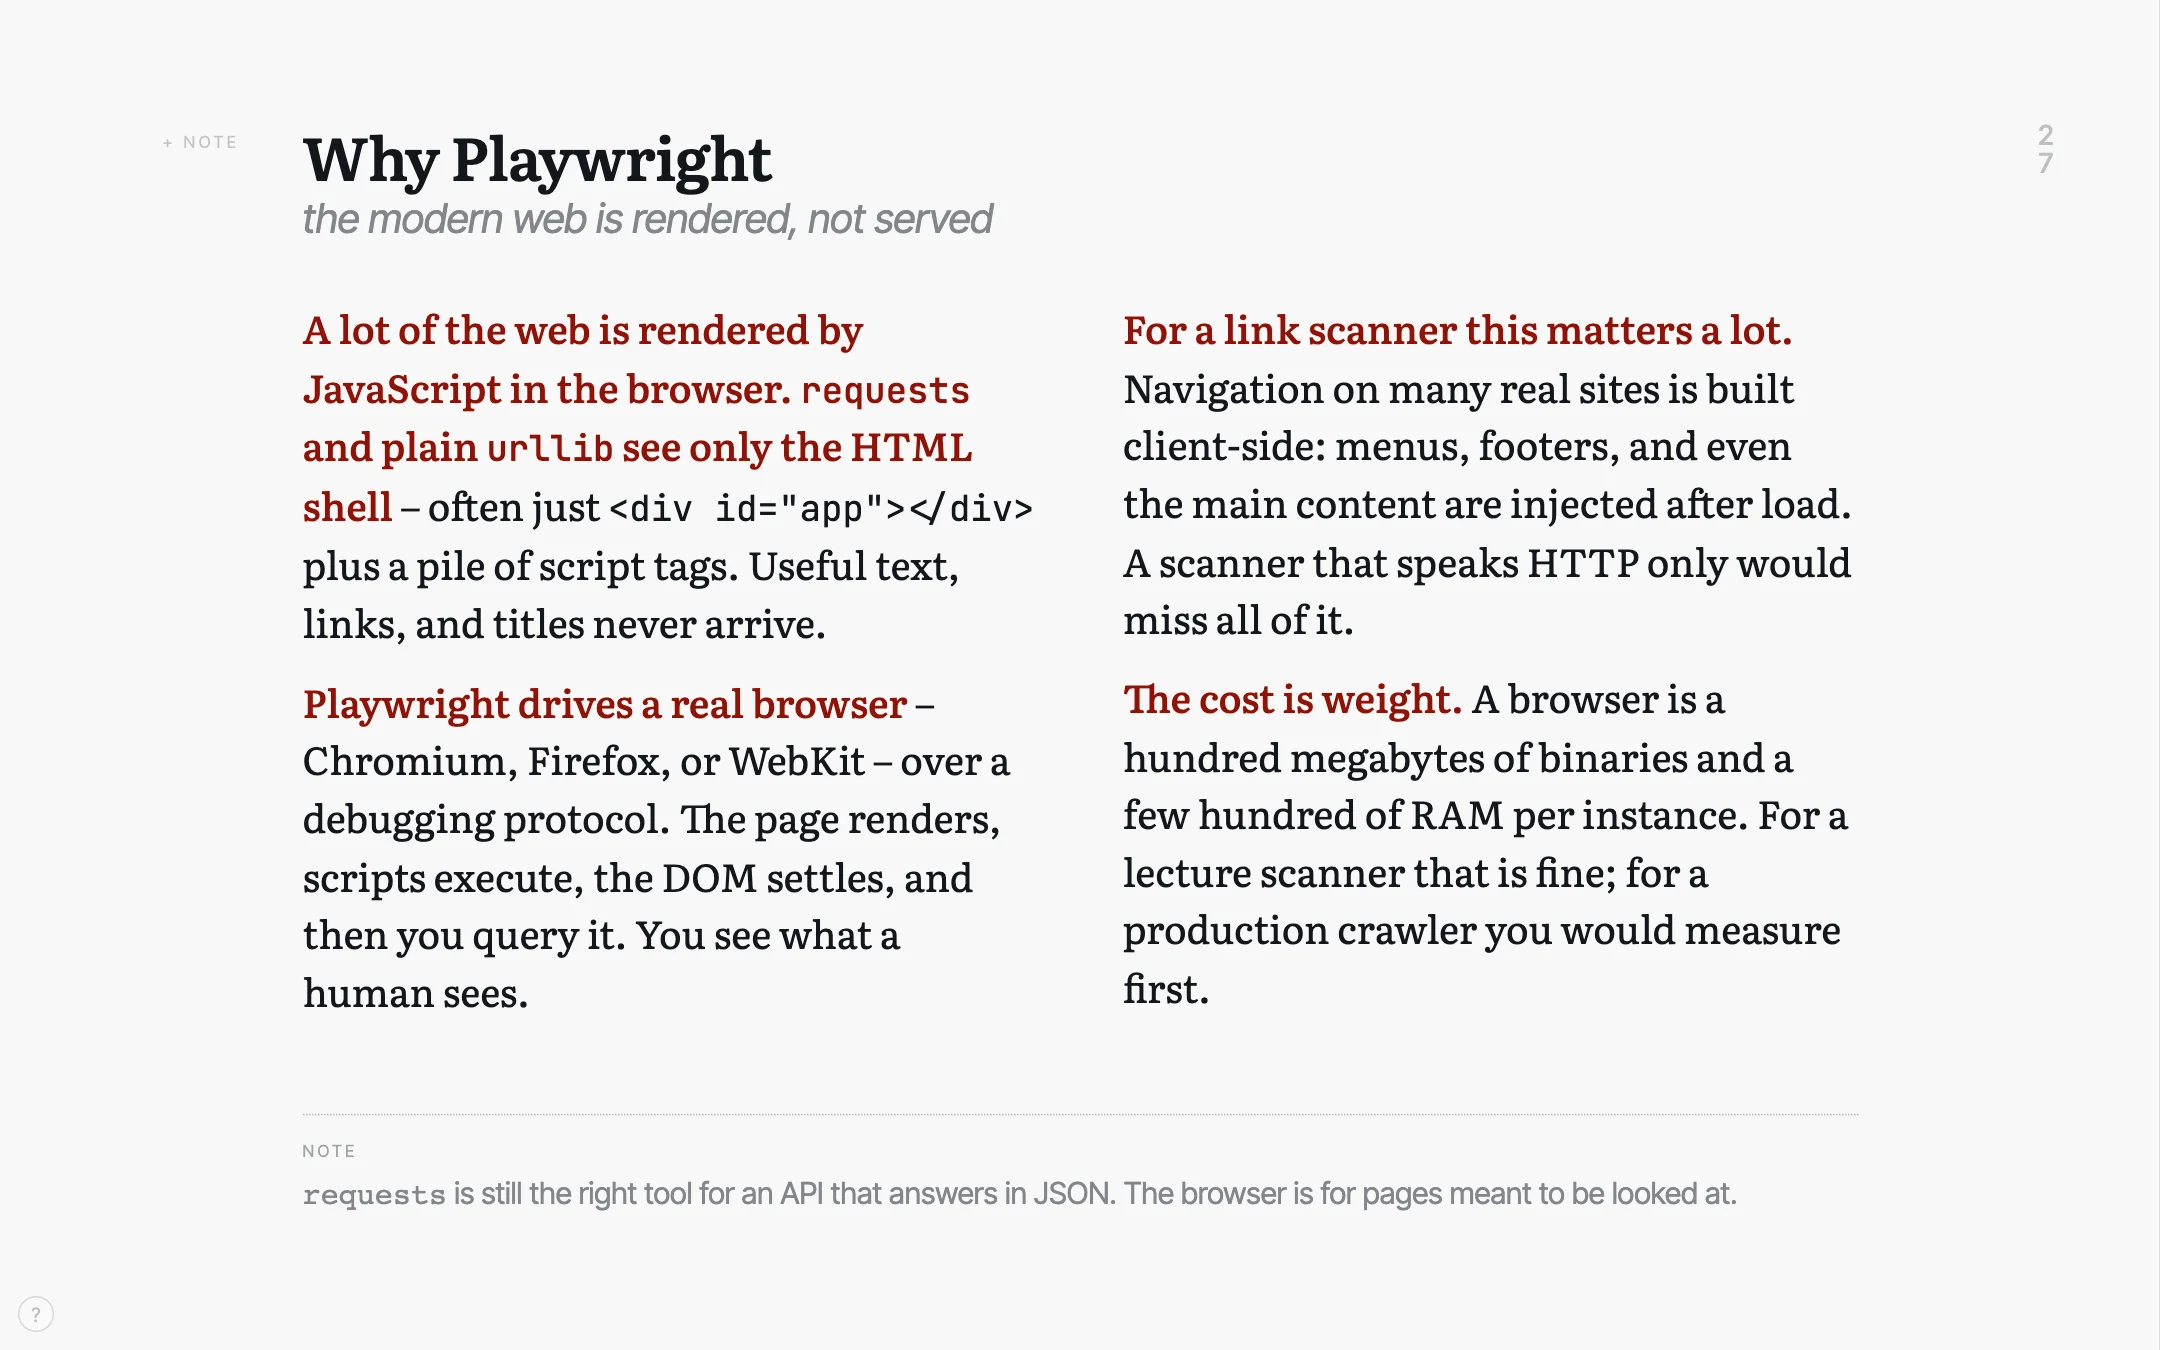
One slide of a real lecture, twice. Once as the room sees it, and once with the same four paragraphs in full. One keypress separates them.
Flip the switch in the second picture’s title bar and the full text becomes the printed handout – a different file, built from the same source. Click any picture on this page to see it at full size.
The one-minute version
The argument on this page as a film: what a lecture is made of, what comes out of one file, and what the hour in front of the room looks like. Subtitled. Auch auf Deutsch.
The video sits on a server of our research group at the University of Bamberg, not in this page, and it is fetched only once you press play. It is the one thing on this site that reaches anywhere at all.
A lecture holds three kinds of text
What goes on the slide has to read from the back row. The script – the sentences that do the explaining – belongs in a handout. And the notes to yourself belong on your own screen and nowhere else. Three texts, and a slide with a notes field under it holds two of them. That ends in one of three ways.
not ideal: everything on the slides
The script goes onto the slides, so the slides fill up. By the third bullet the back row has stopped reading them, and there is still nothing to hand out afterwards.
This is death by PowerPoint, and it is what happens when a lecture has one place to put three texts.
also not ideal: slides and a script
Sparse slides, and the argument in a second document beside them. That works until you edit one of the two, which is usually the same afternoon.
From then on the handout describes a lecture you no longer give, and your notes to yourself still have nowhere to live.
our approach
Write each paragraph once, and mark the one sentence that carries it. The projection takes that sentence. The handout takes the whole paragraph. The lines you start with > note: stay on your own screen.
The three texts live in one file, so they cannot fall out of step.
This is the whole source of that slide
Nine paragraphs of Markdown, no editor and no template. A chunk is one heading with the text under it, and a chunk becomes one slide. The lecture the slide comes from is real: an introduction to Python in 36 chunks.
Read the bold. Those are the phrases the projection keeps;
the prose around them is what the handout keeps. The
> note: at the foot stays on your own screen.
Two of the four paragraphs are trimmed to an ellipsis so the listing fits this web page – that is this page’s doing, not the tool’s. In the projection the lecture’s two columns fold into one, because four shortened paragraphs do not balance; with the shortening off, and in the handout, the columns stay.
## free: Why Playwright | the modern web is rendered, not served {.wide #why-playwright}

::: cols 2

**A lot of the web is rendered by JavaScript in the browser.**
**`requests` and plain `urllib` see only the HTML shell** – often just
`<div id="app"></div>` plus a pile of script tags. Useful text, links, and
titles never arrive.

**Playwright drives a real browser** – Chromium, Firefox, or WebKit – over a
debugging protocol. The page renders, scripts execute, the DOM settles, and
then you query it. You see what a human sees.

**For a link scanner this matters a lot.** …

**The cost is weight.** …

:::

::: footnote
`requests` is still the right tool for an API that answers in JSON. The
browser is for pages meant to be looked at.
:::

> note: Show the difference live if the room is awake: open a JS-heavy site,
> curl it, and let them find the missing text themselves.
The hour in front of the room
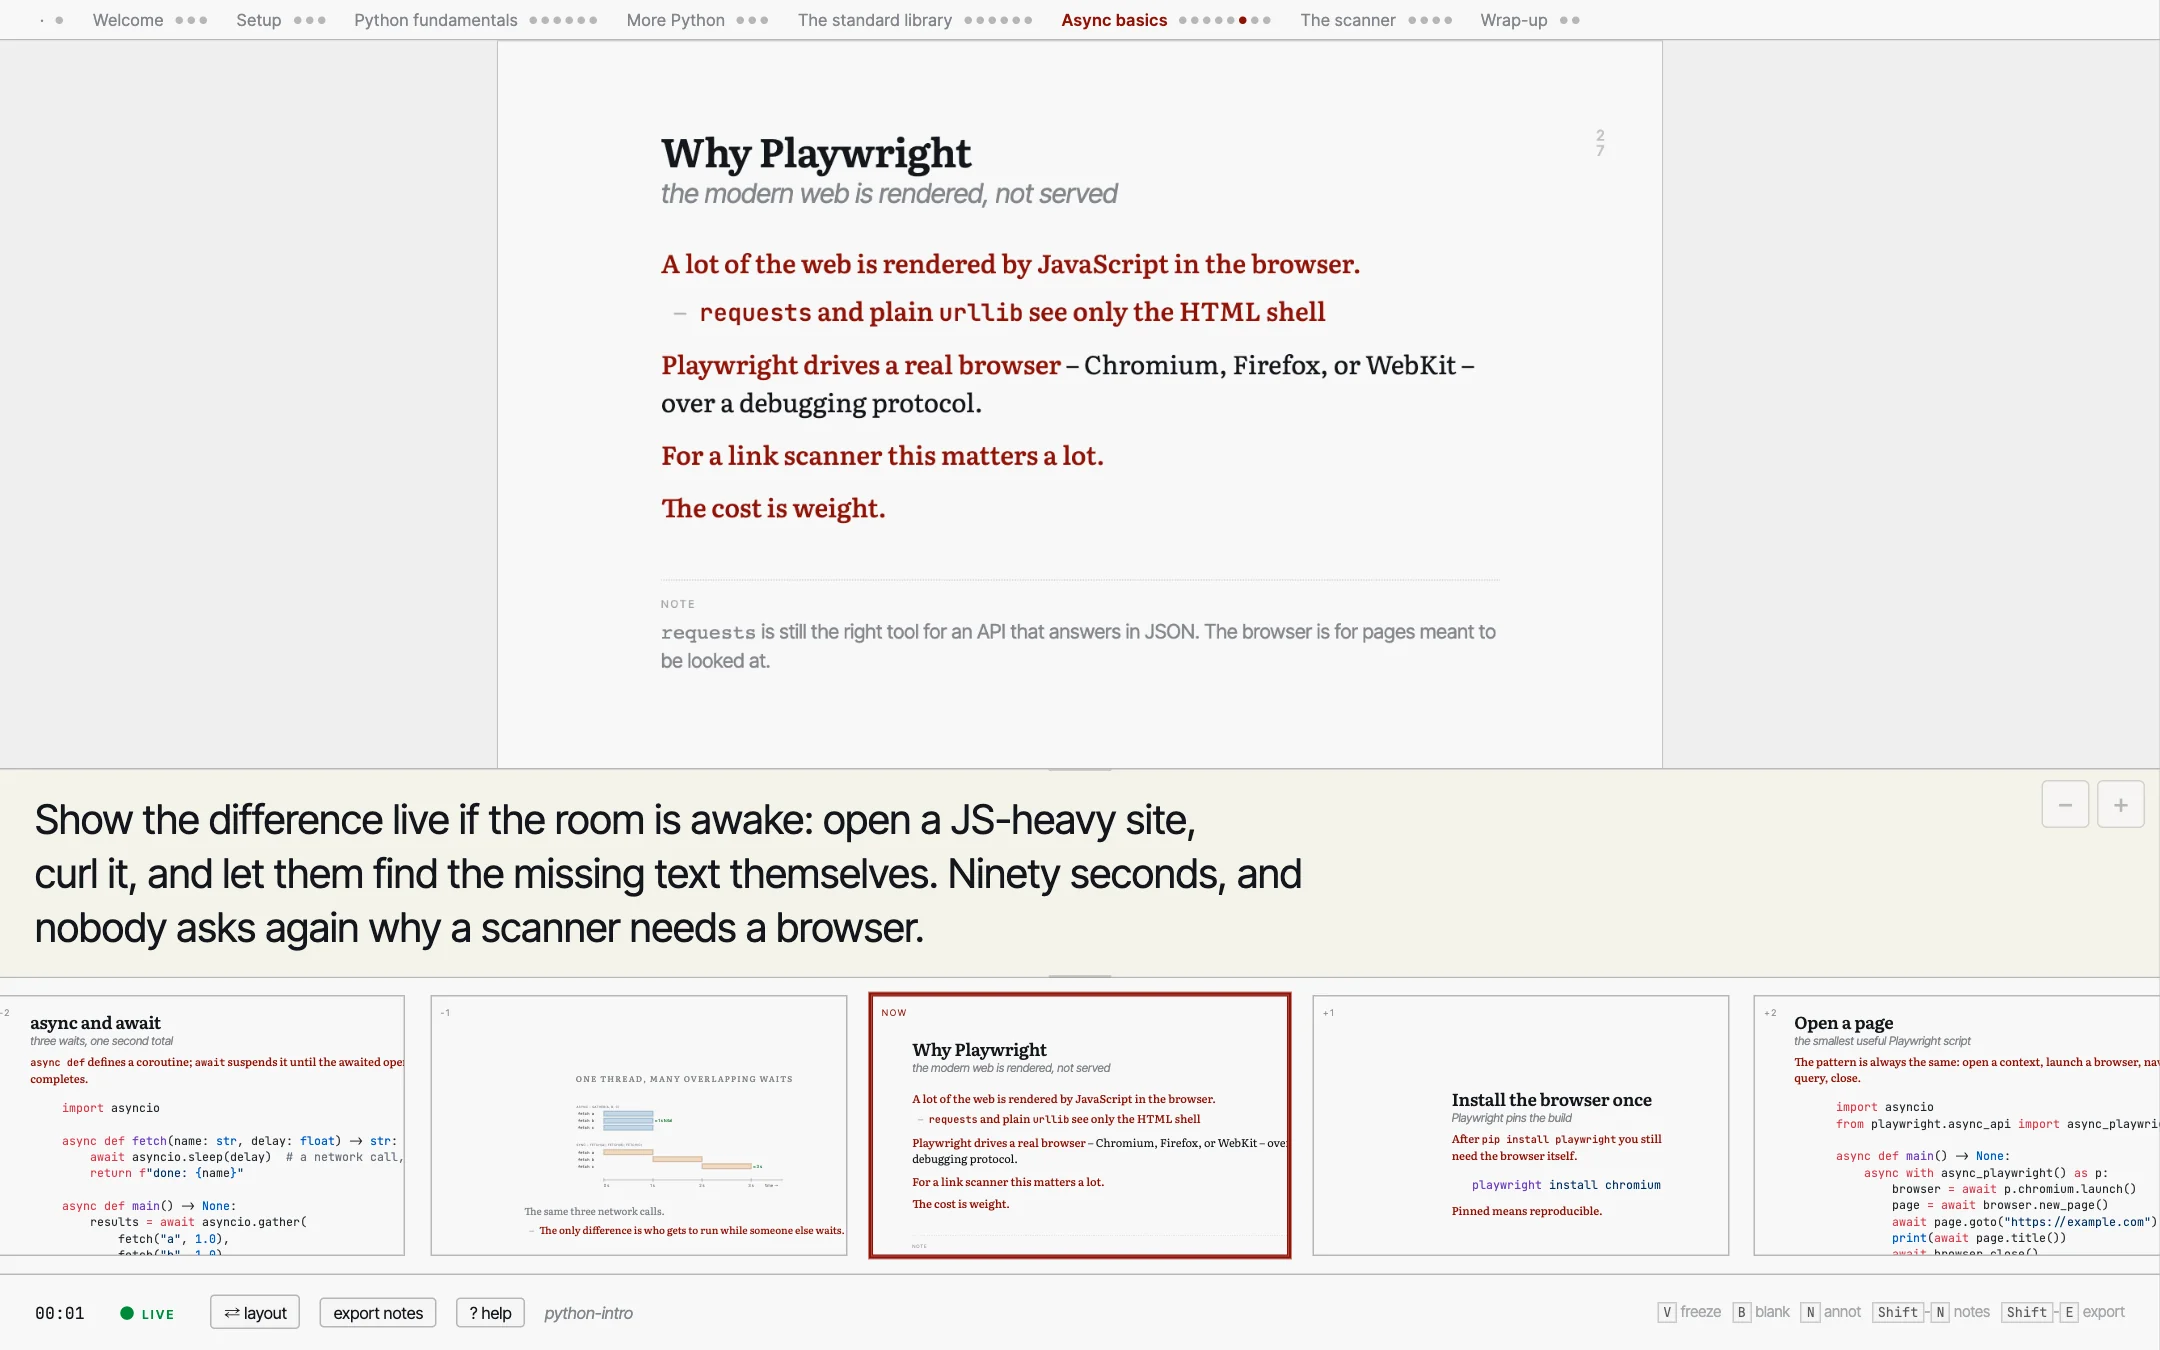
The projection goes on the wall, the cockpit on your laptop, and the two keep each other in step in the browser, with no server between them. Your note, what is coming, a clock, a way back to slide forty, and a box you can type into that the room reads along with.
In the room walks through the hour itself: what you do at each point of it, and the key you do it with.
What the students take away
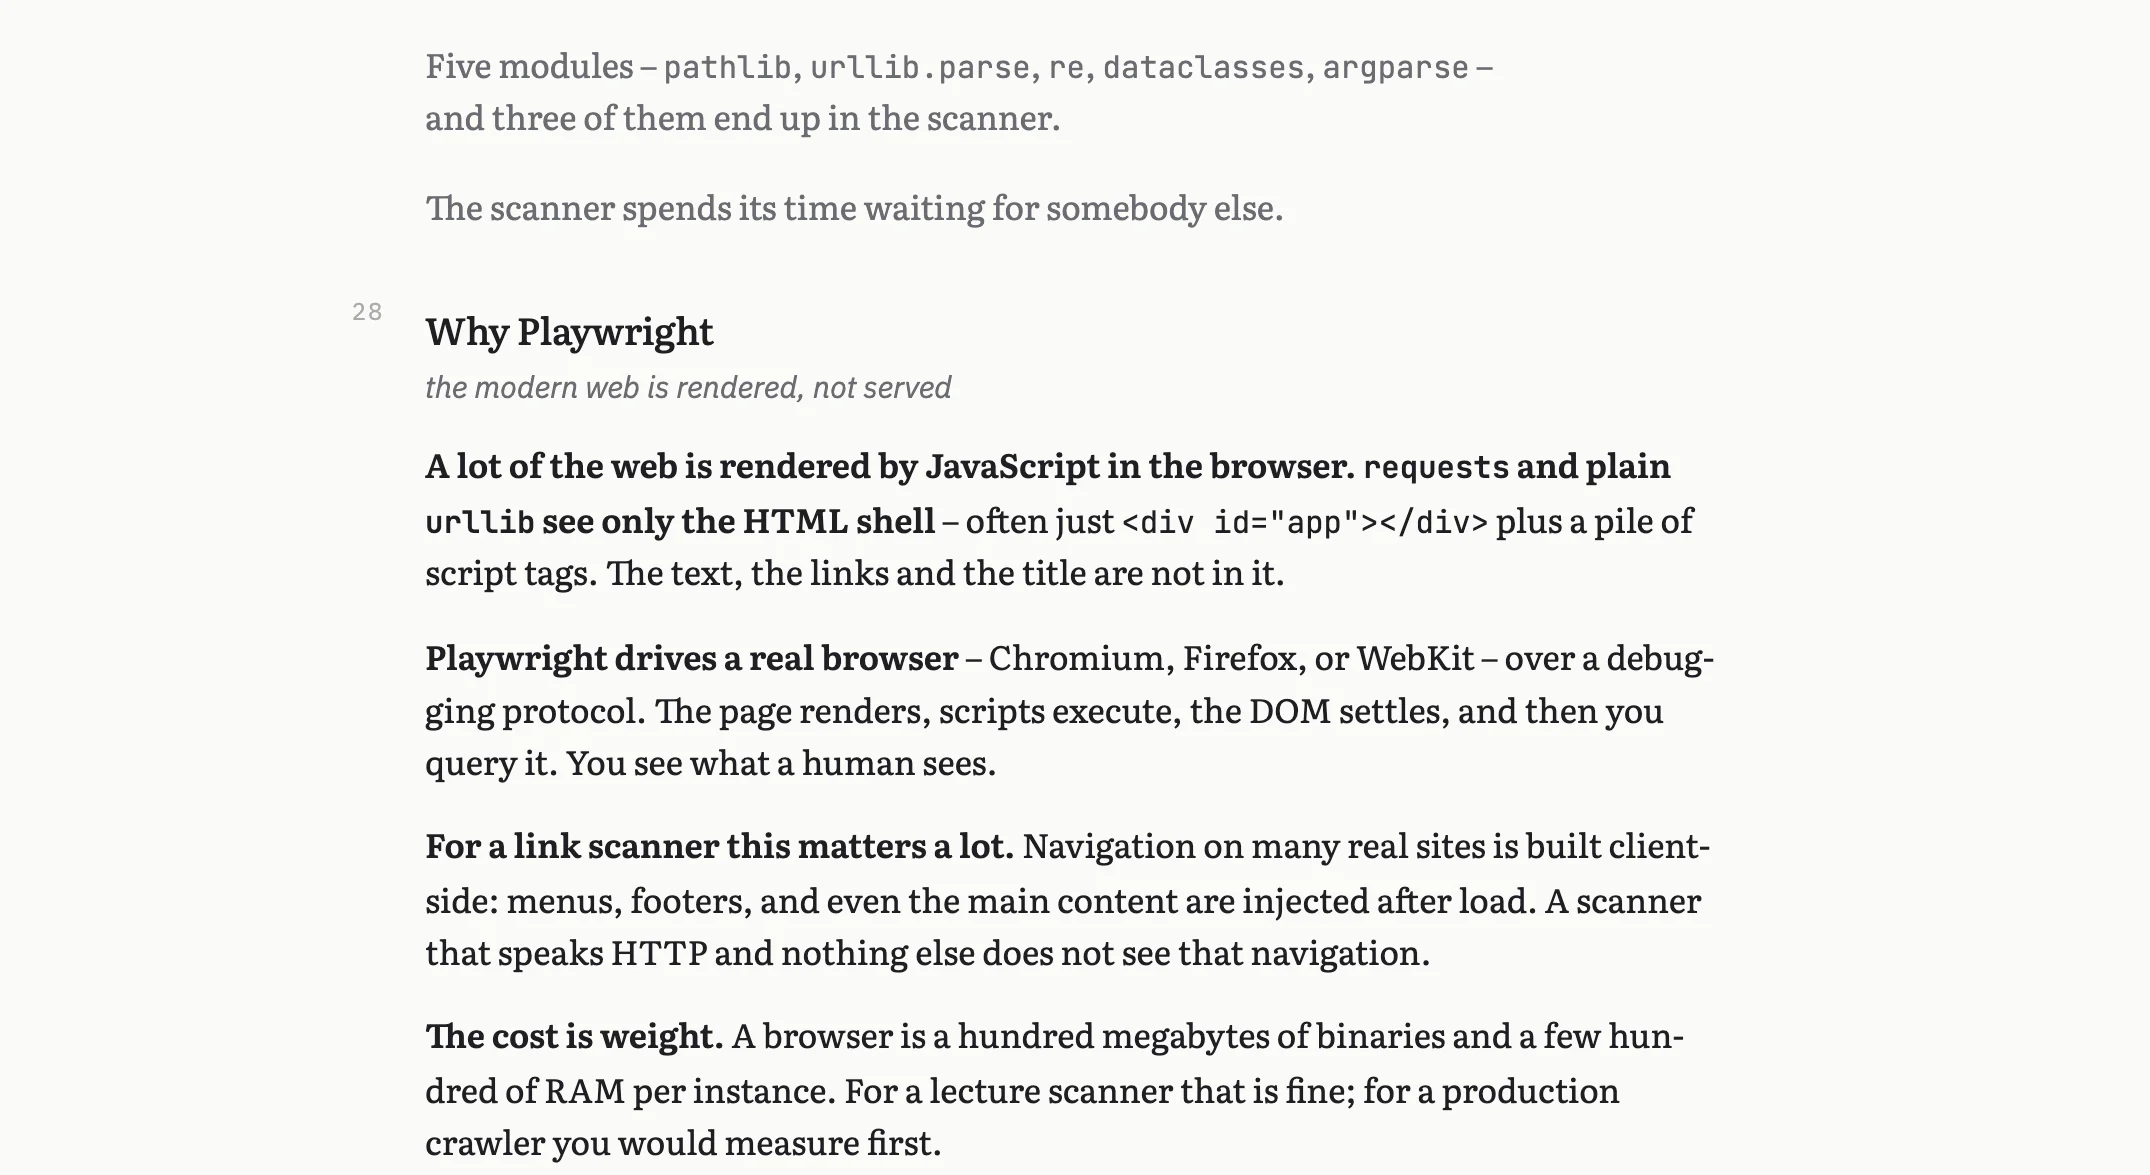
The same source, typeset as a document: hyphenated, at a line length made for reading, with the margin note as an aside.
There are two such documents, and you see them both with the
switch in the title bar. print.html carries the script alone and is the one
to hand out. print-notes.html folds your speaker notes in under
each chunk and stays with you.
A slide is a frame, not only a column of text
You pick what a slide is made of in one line of the source, and the text of the slide stays as it was written: a title slide, the divider that opens each part, a row of cards, a photograph the words stand on, a list that stays at the edge of the frame for a whole part.
A slide is a frame shows the lot: ten ways to open a lecture, six dividers, and the difference between something laid over the slide and something the slide makes room for.

A figure is text too
A figure drawn in a program of its own leaves a second file to keep in step, and that is the one that goes out of date. psi-slides has a small language for figures instead: a figure is a few lines in the same file as the slide it sits on.
Only the first box in this figure has a position of its own. The others are placed against a box that is already there, so moving one box moves what is attached to it – and the figure can be built up in front of the room a step at a time.
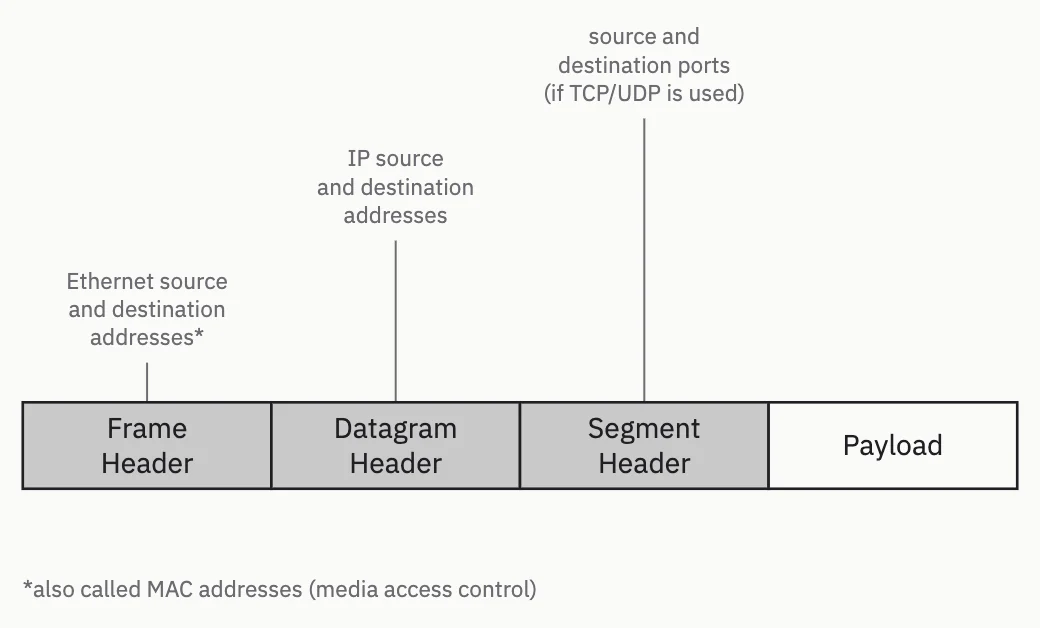
Part of its source: the four boxes, one of the three notes, and the step that brings that note in.
Lengths are in grid cells, not pixels –
the opening line sets the cell, so a figure keeps its proportions when the
cell changes. And -- fh.cx,fh.top draws a leader
line: it points at a spot on another box and stays attached when
that box moves.
::: draw 150x54
default box {.tone-3 .sharp} w 0.88 h 0.85
box fh "Frame\nHeader"    at 0,0
box dh "Datagram\nHeader" right of fh gap 0 same as fh
box sh "Segment\nHeader"  right of dh gap 0 same as fh
box pl "Payload"          right of sh gap 0 same as fh {.paper}
text lmac "Ethernet source\nand destination\naddresses*"       above fh gap 0.5 -- fh.cx,fh.top {.muted @l1}
step ethernet
  show @l1
  emph fh
The figure language is newer than the format promise. Both ways of getting psi-slides build it – the app carries it, and so do the sources. What it has not got yet is the promise that came with 1.0.0, so a figure you write today may need an edit when the language reaches a release of its own.
Figures you write is the case for the language: what a lecture figure has to do that a drawing program and an auto-layout language each do badly. The manual builds one a line at a time, lists every statement, and shows the graphical editor that lets you drag a box on the live slide and have the source rewritten.
Open the lectures yourself
These are the tool, not a video of it. Move with the arrow keys, press C to switch between the shortened text and the full text, O to see the whole lecture at once, / to search, and ? to list the keys.
Start here: python-intro
36 slides · about 25 minutes
The lecture the slide at the top of this page comes from: an introduction to Python for people who have written some code before. Open the projection and press C to see the same slide shortened and then in full.
Then: the tutorial
92 slides · a reference to dip into
How the format works, explained by a lecture that is itself built out of it. Its source is the model to write your own lecture against.
The other three lectures
python-intro and the tutorial are the two above; these are the rest. They are built from the repository rather than the release, and of Decoration only two of the four views are published here.
Short example 6 slides · German
One section of a first-year networking lecture. Eighty-odd lines of Markdown, short enough to read end to end beside what it produces.
Figures 40 slides
Every construction the figure language has, drawn rather than described, with figures from a real course among them.
Decoration 39 slides
What puts something other than a text column on a slide: title slides, dividers, cards, backdrops, a photograph that opens as you press Space.
A lecture’s four files are self-contained: the styling, the scripts, the images,
the typeset maths and the typefaces sit inside the HTML file itself. Nothing
is fetched at run time, and they open as happily from a folder on disk
(file://) as from this server.
A cockpit opened from a link above shows the layout but does not follow a projection – press S inside a projection to open one that does. The four links on each card open the four files of that lecture, and every one of them is the file you would have built yourself.
Getting started
Two ways in, and they build the same four files.
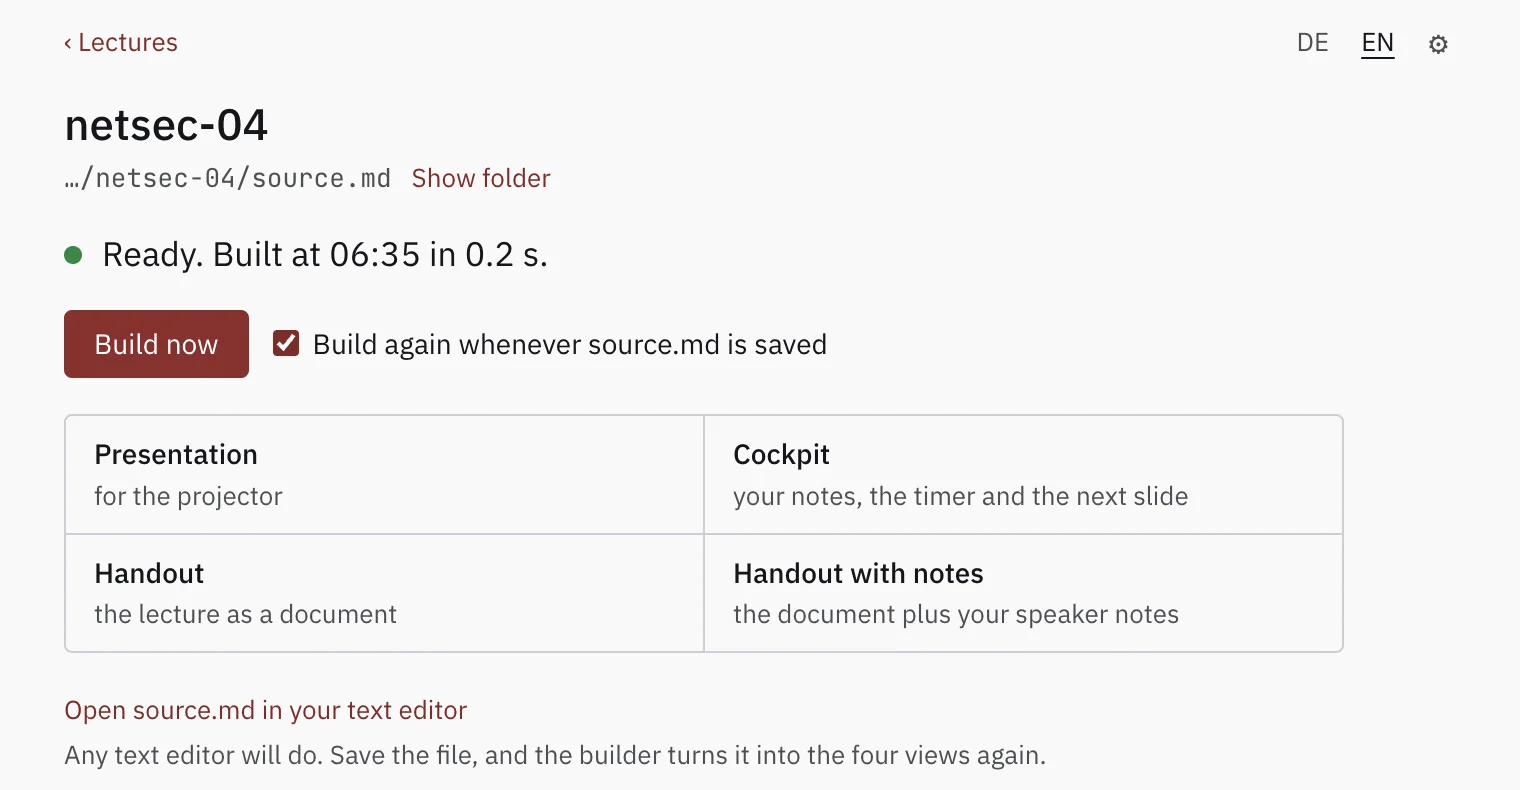
the app
The app you download, and it builds at the press of a
button: open a source.md in it, and it builds again every time
you save. Nothing else has to be installed – no Node, no
terminal – and nothing leaves the computer: it runs the same build on
your own machine and writes the four files beside your source.
the command line
The command line starts with a clone of the repository
and one npm install, for people who already work in a
terminal – and it is the way to write a lecture with a language model
beside you, because the repository carries the skills that teach one the
format.
$ node build.js lectures/tutorial/source.md
[inline-images] auto-inlining 2 image(s), 0.00 MB total (under 10 MB budget). Use --no-inline-images to disable.
[fonts] 6 bundled face(s) embedded – Literata, IBM Plex Sans, JetBrains Mono – 279 KB per view (OFL-1.1). Use `fonts: none` to ship without them.
[qr] 1 link address(es) carry a QR code, 3 KB per live view.
[math] 5 KaTeX font families inlined, 166 KB of woff2 per live view (of 254 KB for the full set); print carries only the families its formulas use. A lecture without math inlines nothing.
Wrote lectures/tutorial/print.html, lectures/tutorial/print-notes.html, lectures/tutorial/audience.html, lectures/tutorial/speaker.html (12 columns, 92 chunks)
$ ls -al lectures/tutorial/*.html
-rw-r--r--  1 dh  staff  2354468 Sep 10 05:20 lectures/tutorial/audience.html
-rw-r--r--  1 dh  staff   961611 Sep 10 05:20 lectures/tutorial/print-notes.html
-rw-r--r--  1 dh  staff   953385 Sep 10 05:20 lectures/tutorial/print.html
-rw-r--r--  1 dh  staff  2480979 Sep 10 05:20 lectures/tutorial/speaker.html
The next page has the downloads for macOS, Windows and Linux, the commands, and a walkthrough that starts on a machine with nothing installed on it.
Where to read further
- How psi-slides compares Beamer, reveal.js, Quarto, Marp, Slidev, PowerPoint and friends, in both directions, including where psi-slides loses.
- Figures you write The case for the figure language, and the manual beside it, which builds one a line at a time.
- The tutorial lecture The format shown working rather than described, with its source beside it.
- The repository The README explains the format and says what the tool is good at and what it is not good at.